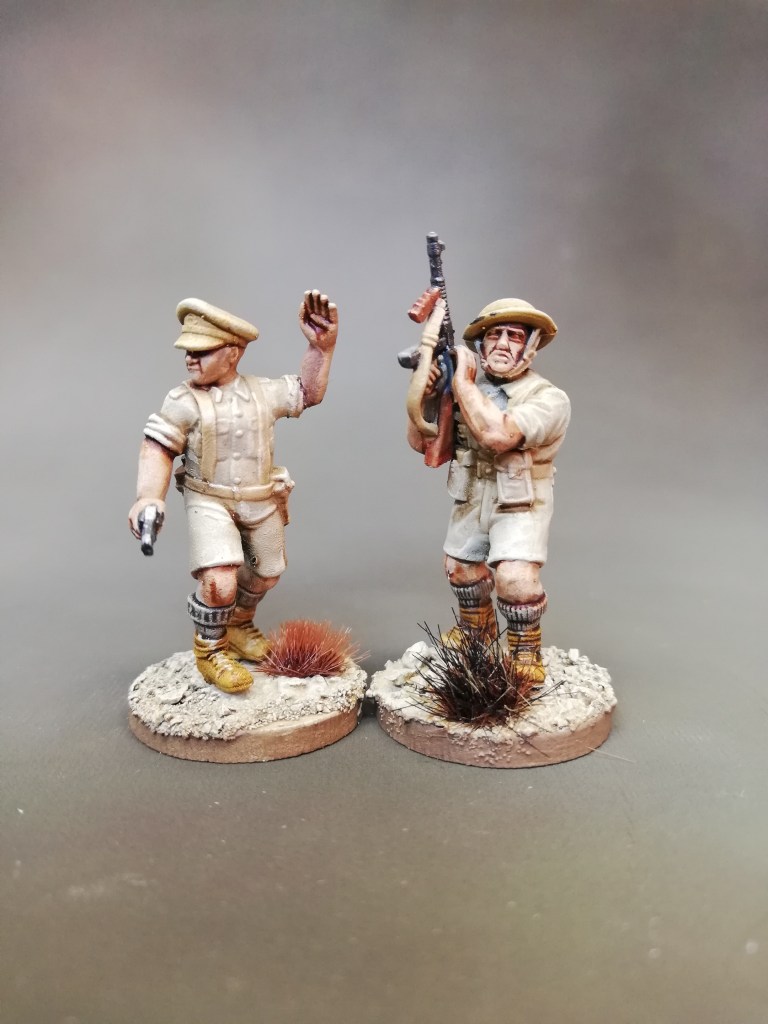
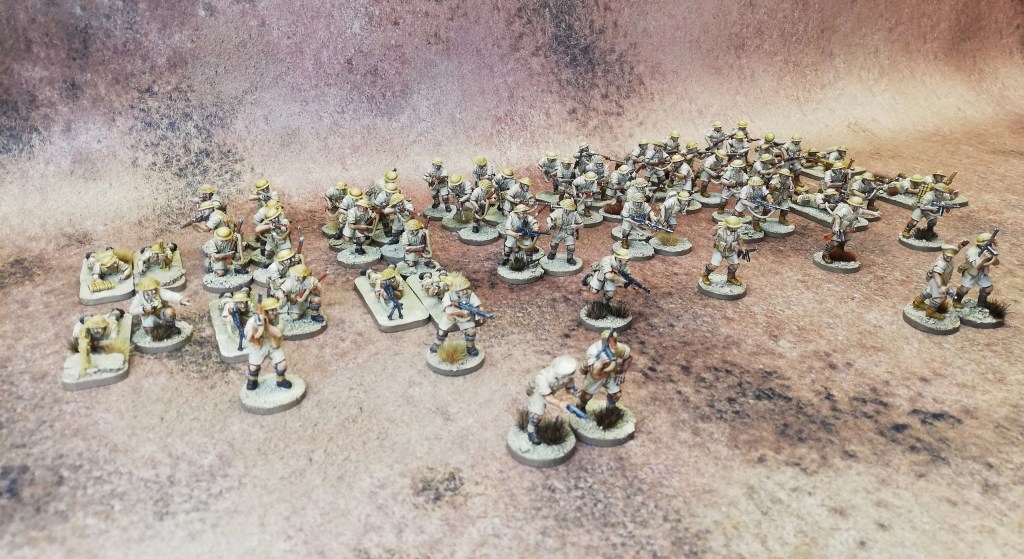
I’m planning a large battle for Chain of Command that involves several platoons of British, Germans and even Italiens, set in the North African teatre in 1941 or so about.
With the total number of miniatures going well above a hundred, including a bunch of vehicles and terrain, I need to find a way to paint a lot of minis in a reasonable time. Such a task seems like the ideal job for Contrast paints and so I’ve come up with a way of painting British infantry rather quickly.
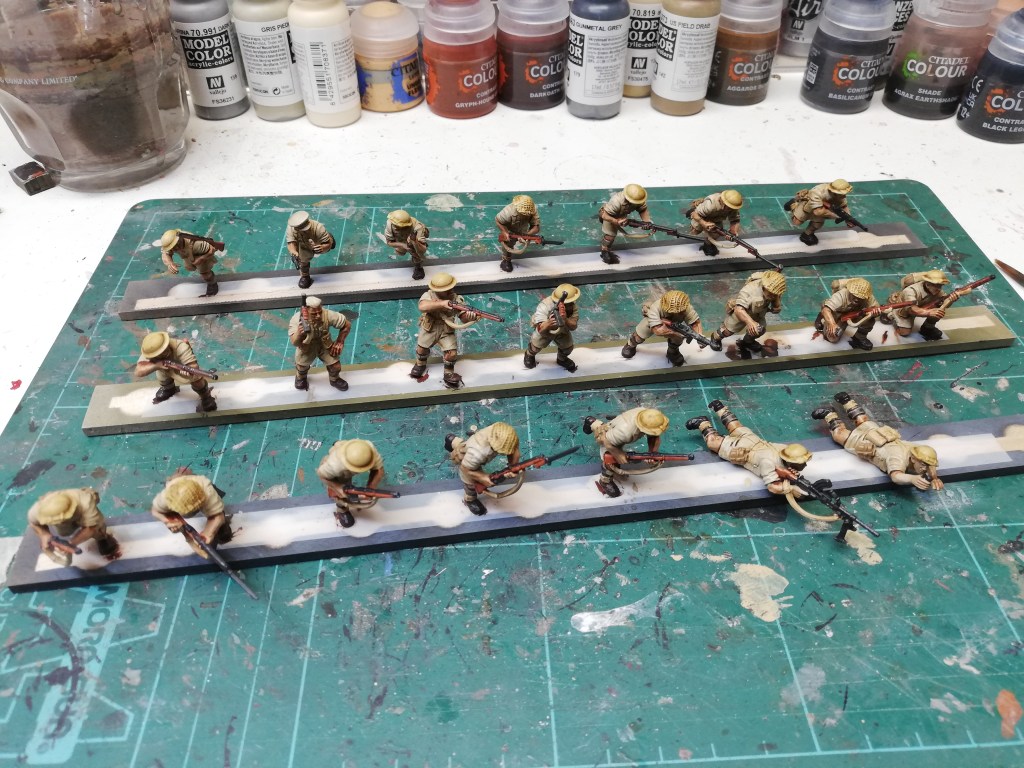
Assembly: The models are mostly plastics from Warlord Games with the odd addition of some 3D printed ones. When batch painting such a large number of models I prefer to do the bases first and wait to glue the models on until after all the shading and drybrushing has been done. This way I can do 50 or more bases in no time without having to worry about accidentally hitting the model when I paint the bases.
Before priming I stick the models on paint-stirrer sticks using double sided tape. The models are primed using Army Painter Skeleton Bone spray-paint.
I then paint all the webbing, magazine pouches and such with Vallejo Iraqi Sand.
Then, I do a heavy drybrush covering the entire model with Vallejo Pale Sand. This creates a better foundation for Contrast Paints which will result in much nicer highlights compared to plain basecoating.
After the drubrush all the different pieces are basecoated as follows:
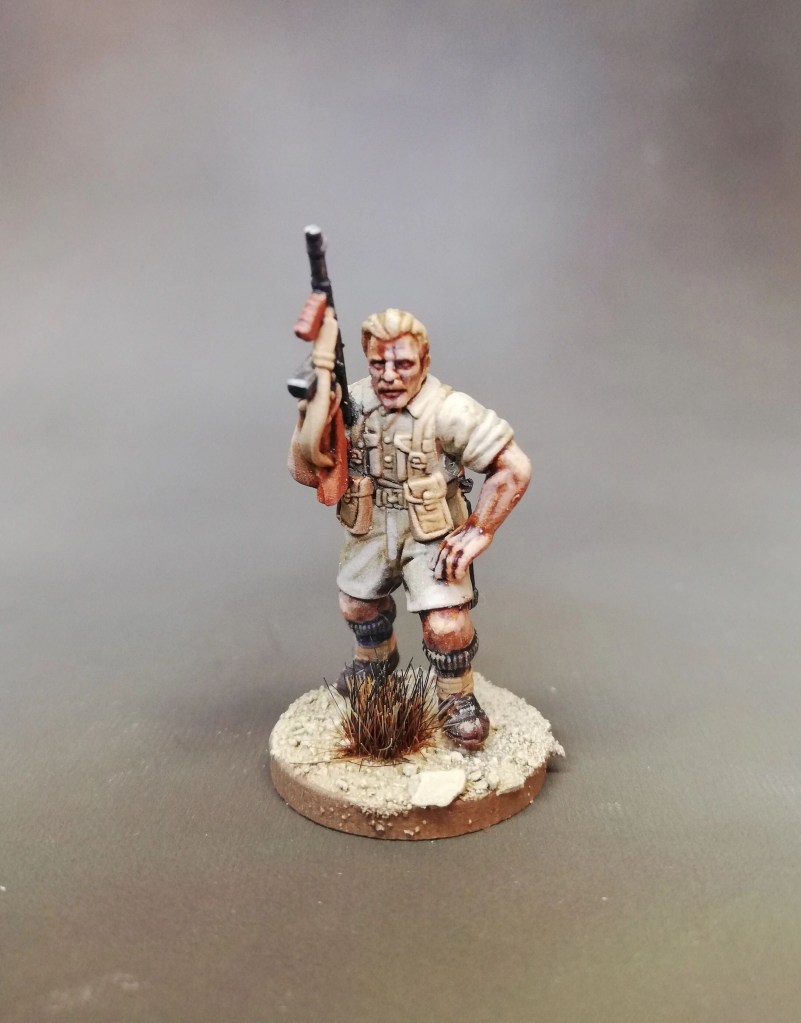
- Skin: Contrast Dark Flesh (as I really want them to look sunburnt after being in the desert for months.)
- Helmet: Contrast Aggarax Dunes. The British helmets were a tad darker than their basic uniforms, and Aggarax Dunes was the closest match.
- Rifle: a mix of 1/3 Contrast Cygor Brown + 2/3 Contrast Gryph-hound Orange. Cover the whole thing, don’t worry about the metal parts, those will easily be covered later.
- Webbing: pick out some of the parts that have been masked too heavily by the drybrushing with Iraqi Sand.
- Canteen: Vallejo US Field Drab.
- Boots: Contrast Snakebite Leather. (their boots were actually darker but using a lighter leather tone helps show the details.)
- Socks: Contast Basilicanum Grey. This was a mistake! I should have used a much brighter tone of grey, Basilicanum is too dark. But I only realized this after painting the first 30 or so and so I stuck with it.
Then do the metallics using Vallejo Metallic Black, it’s an airbrush color that I really like because it flows so smoothly and still has excellent coverage.
Shading – its the fun part. I always enjoy shading as it really brings the model to life. I shade the whole model boots, skin, weapons, all of it – but take care and clean up those bigger puddles of shade. For this part I use a mythical brown substance referred to as Aly’s Brown Liquid https://alystoysoldiers.blogspot.com/p/a.html However since GW have changed their recipe for their shades I decided to do my own version. The aim is to create a shade that works for both clothing, skintones and all the other parts of the model. It needs to both pool in recesses and create a gradual toning across larger areas, preferably without leaving coffee stains across the surface. I’ve come up with 1 part Army Painter Strong Tone + 1 part GW Seraphim Shade + 1 part Contrast Medium. Whatever volume you end up with you then add 50/50 parts of water (you can add less water if you want a stronger shade) finally some drops of GW Drakenhof Nightshade to bring the wash into a cooler tone.


Finally I glue the model onto the base. Oh yeah, the bases are just sand with a bit of very fine gravel mixed in. They are also sprayed with Skeleton Bone, then washed with Armypainter Soft tone or similar and then drybrushed with Iraqi Sand / Pale Sand.
Paint the rim of the bases. I use GW Steel Legion Drab, some prefer black but with such a pale colored model as this, I think black will maybe stand out too much. Each to their own, I suppose.
The model is essentially done now and would look reasonable on a gaming table. I went a bit further and added highlights. Notice that at no time did I paint the uniform, those are all done with just the primer and the shade. I did however highlight the uniform using Pale Sand. I also highlighted some of the other parts such as the cantena straps, the rifle strap and some of the skin areas got highligted and reworked a bit. I won’t go into details about which excact colors I use for highlights as I use a wet palette it is impossible to give excact measures here. No. 1 rule of highlighting is: Go brighter than you think!